Welcome to My Blog! 🌟
Before we dive into the content, I’d love for you to join me on my social media platforms. It’s where I share more insights, engage with our vibrant community, and post regular updates. Here’s how you can stay connected:
📘 Facebook: Connect with me on Facebook
Now, let’s embark on this journey together. I hope you find the content here insightful, engaging, and most importantly, valuable. Let’s explore, learn, and grow together! 🚀
Table of Contents
Introduction
When it comes to choosing the right tool steel for demanding industrial applications, understanding the S7 tool steel Rockwell hardness chart is essential. S7 tool steel, classified as a shock-resistant grade, is often used in tools that undergo high impact or sudden loads, such as punches, chisels, and shear blades. However, while many industries use S7, few take the time to understand what the Rockwell hardness chart truly reveals about its performance.
In this blog post, we will uncover the hidden truths behind the S7 tool steel Rockwell hardness chart. You’ll learn why this chart matters, how to interpret it properly, and what pitfalls to avoid when selecting or heat-treating S7 steel for your applications. With detailed explanations, a comprehensive chart, and expert insights, you’ll gain clarity on a subject that many overlook.
What Is S7 Tool Steel and Why Its Hardness Matters
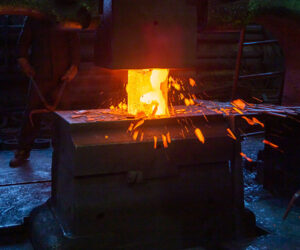
S7 tool steel is a chromium-based air-hardening steel that delivers a unique balance of toughness and hardness. Unlike many other tool steels, S7 is designed to resist cracking or breaking under sudden shocks or repetitive impact.
One of the most defining properties of this material is its ability to maintain strength and wear resistance even after rigorous heat treatment. This is where the importance of the S7 tool steel Rockwell hardness chart comes into play. The chart provides insight into how heat treatment processes influence hardness levels and how these levels correlate with the steel’s practical usability in various conditions.
The Rockwell hardness scale, particularly the C scale (HRC), is used to measure the material’s resistance to deformation. For S7 tool steel, the typical hardness range is around HRC 54-58 after heat treatment, depending on the tempering process. However, without referencing the correct chart, users risk misinterpreting this data, leading to improper tool selection or treatment errors.
Understanding the S7 Tool Steel Rockwell Hardness Chart
The S7 tool steel Rockwell hardness chart outlines the relationship between temperature, time, and resulting hardness. This chart is crucial for metallurgists, machinists, and quality control engineers who want to ensure that the steel performs as expected under stress.
Hardness depends on a range of variables:
- Quenching temperature
- Tempering temperature
- Holding time during tempering
- Cooling rate
Each of these influences where S7 lands on the Rockwell C scale. Below is a detailed table that outlines typical hardness results based on tempering temperature.
S7 Tool Steel Rockwell Hardness Chart (Tempering Data)
| Tempering Temperature (°F) | Approximate Hardness (HRC) | Application Insight |
|---|---|---|
| 300 | 58 | Maximum hardness, low toughness |
| 400 | 56 | Balanced for general impact tools |
| 500 | 55 | Improved shock resistance |
| 600 | 54 | Better toughness, lower wear resistance |
| 700 | 52 | Optimal for high-impact environments |
| 800 | 50 | Great ductility, reduced edge retention |
This chart helps users understand how different heat treatments adjust the hardness level and how it affects performance characteristics. For instance, a hardness of HRC 58 might be ideal for wear resistance but not for resisting fractures during sudden shock loads. On the other hand, a tempered S7 at 700°F might handle heavy impacts better but wear out faster.
Common Misinterpretations of the S7 Tool Steel Rockwell Hardness Chart
One of the hidden truths behind the S7 tool steel Rockwell hardness chart is that many users rely on it without understanding its limitations. A few common mistakes include:
- Believing that higher HRC always means better performance
- Ignoring the role of tempering time and quenching technique
- Using generalized hardness data without accounting for actual use cases
Relying solely on peak hardness can lead to poor results. For example, using S7 hardened to HRC 58 in an application that requires flexibility can result in premature tool failure. Understanding how to balance hardness and toughness based on application needs is key to leveraging the full potential of S7.
Additionally, users should note that the S7 tool steel Rockwell hardness chart is a reference tool, not a universal rulebook. Actual hardness values may vary depending on steel batch quality, machining conditions, and exact heat-treatment practices.
Practical Applications That Rely on S7 Tool Steel Hardness

The applications for S7 tool steel are diverse, ranging from industrial dies to hand tools and machine components. Understanding its Rockwell hardness allows manufacturers to optimize tool life and reduce failure rates. Some common uses include:
- Cold work tooling
- Air hammer tools
- Punches and chisels
- Injection molding components
- Shear blades
Each of these applications requires a different balance of wear resistance and impact strength. That balance is directly influenced by heat treatment and reflected in the S7 tool steel Rockwell hardness chart.
For instance, a cold-work punch may benefit from an HRC around 56, balancing wear and toughness, whereas a shear blade used in high-vibration settings may require softer hardness (HRC 50-52) to avoid fracturing.
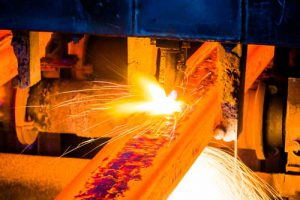
Heat Treatment Best Practices Based on the S7 Tool Steel Rockwell Hardness Chart
To get the most out of your S7 tool steel, you need to adhere to proven heat-treatment protocols. These include:
- Preheating: Slowly preheat the material to about 1200°F to reduce thermal shock.
- Austenitizing: Heat to 1725°F to 1775°F and hold for 30 minutes per inch of thickness.
- Quenching: Air cool or oil quench, depending on desired hardness.
- Tempering: Use the S7 tool steel Rockwell hardness chart to select appropriate tempering temperature.
It is always recommended to double temper S7 steel, especially when it will be used in high-stress conditions. Cooling to room temperature between tempers ensures better structural stability.
Proper application of this process, guided by the chart, results in tools that are both resilient and long-lasting.
Conclusion
The S7 tool steel Rockwell hardness chart is more than just a table of numbers. It’s a blueprint for getting the most out of a highly specialized material. Those who understand its nuances are better equipped to design and produce tools that last longer, perform better, and fail less often.
By understanding how temperature and heat treatment influence the hardness and toughness of S7 tool steel, professionals can make smarter decisions in the workshop or manufacturing floor.
Don’t fall into the trap of over-relying on hardness alone. Use the chart as a guide, not a guarantee—and always consider your application’s real-world demands.
FAQ
What is the typical Rockwell hardness of S7 tool steel?
After proper heat treatment, S7 tool steel typically achieves a Rockwell hardness rating between HRC 54 and 58. This range depends largely on the tempering temperature and method used. Lower tempering temperatures (around 300°F) tend to result in higher hardness (up to HRC 58), offering better wear resistance but less toughness. Conversely, higher tempering temperatures (up to 700–800°F) decrease hardness slightly but improve impact resistance and ductility. The Rockwell hardness chart for S7 tool steel is a crucial reference for selecting the appropriate balance of strength and flexibility for specific tooling needs.
Can I use the same hardness level for all S7 applications?
No. Using the same hardness for all S7 tool steel applications is not advisable. Each industrial task has unique performance requirements that demand a specific hardness-toughness ratio. For example, a cold-working punch might benefit from a higher hardness level (HRC 56–58) to resist surface wear, while a chisel subjected to repetitive impact loads might require a lower hardness (HRC 52–54) to avoid cracking or breakage. Always refer to the S7 tool steel Rockwell hardness chart and tailor the heat treatment process to the end-use application for optimal tool performance and safety.
Is higher hardness always better in S7 tool steel?
Not necessarily. While a higher Rockwell hardness level generally improves abrasion resistance, it often comes at the cost of reduced toughness. For tools that must absorb shock or undergo bending forces, excessively hard steel can become brittle and prone to fracture under stress. The ideal hardness depends entirely on how the tool will be used. For instance, impact tools like air hammers or chisels require a balanced structure, where a moderate hardness ensures both wear life and resistance to cracking. The S7 tool steel Rockwell hardness chart helps you strike this critical balance between hardness and durability.
How does heat treatment affect the hardness of S7 tool steel?
Heat treatment plays a central role in determining the final hardness and performance of S7 tool steel. The three main stages—austenitizing, quenching, and tempering—must be executed precisely. Austenitizing involves heating the steel to around 1725–1775°F to form a uniform microstructure. Quenching (usually in air or oil) rapidly cools the steel to harden it, while tempering adjusts the hardness by reheating it to a lower temperature. Each of these steps directly affects microstructural changes, which in turn determine the Rockwell hardness level. Improper timing or temperature control during any phase can result in suboptimal hardness, internal stresses, or tool failure.
Why is double tempering recommended for S7 tool steel?
Double tempering is a widely recommended practice for S7 tool steel because it enhances both toughness and dimensional stability. After the initial tempering cycle relieves internal stresses and partially transforms the steel structure, a second tempering ensures greater uniformity across the cross-section, especially in thicker components. This second cycle helps eliminate any retained austenite and stabilizes the martensitic structure, reducing the risk of unexpected cracking, chipping, or warping during use. For critical applications where tools are exposed to repeated shock or thermal cycling, double tempering provides an added layer of reliability and performance.